How to Provide Extended Time for Exams on Canvas
There are two basic ways to set time constraints for exams on Canvas, and how to provide your students with Extended Time accommodations will depend on how you have set up these options. If a student needs to take the quiz/exam at an entirely different time from the class due to scheduling conflicts created by their extended time, Method Two will also explain how to do that.
Method One: Setting a “Time Limit”
1. If you have set a “Time Limit” for the exam in Canvas, open the quiz/exam and click the “Moderate This Quiz” button on the top right of the screen.
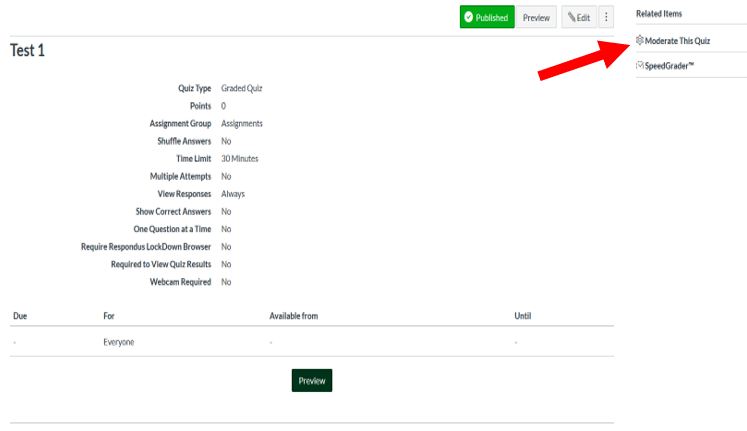
2. You will see a list of students, and on the right side of each row there will be a pencil icon. Click on the pencil, and a box will pop up.

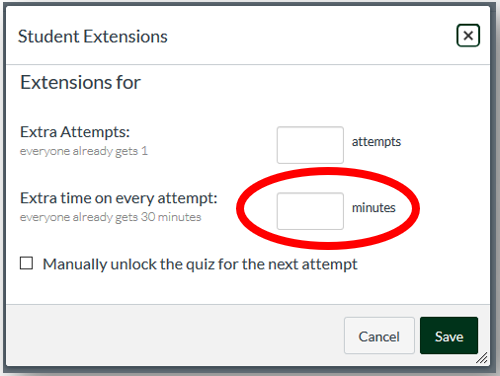
3. Next to the heading “Extra time on every attempt” will be a field where you can enter the number of extra minutes to allow the student. For example, if the class is receiving 50 minutes and the student has been approved for time and a half, enter “25” in this field. If the class is receiving 75 minutes, enter “38”. Please keep in mind that some students are also approved for double time! If the time needs to be changed after the student begins the exam, there will be a clock icon in the “Time” column which you can click on to make adjustments.
4. Make sure that the period of time in which the exam will be available is long enough to cover the extended time exams (see “Method Two” below for instructions on adjusting this). If you do not, the student will lose access to the exam before their full time runs out!
Method Two: Setting an “Available Until” time and/or a “Due” time
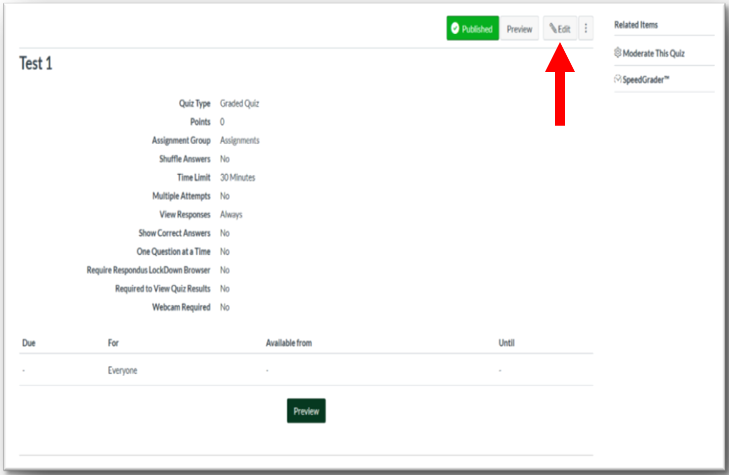
1. If you have not set a “Time Limit” on the exam, but have opted to limit time by setting a “Due” time or “Available Until” time, go to the quiz/exam and click the “Edit” button near the top right of the screen.
2. Near the bottom of the page, you will see a section titled “Assign.” It will likely say “Everyone” in the “Assign to” field, with certain dates and times listed in the “Due”, “Available from”, and “Until” fields. At the bottom of this section will be a button labelled “+ Add”. Click on this button.
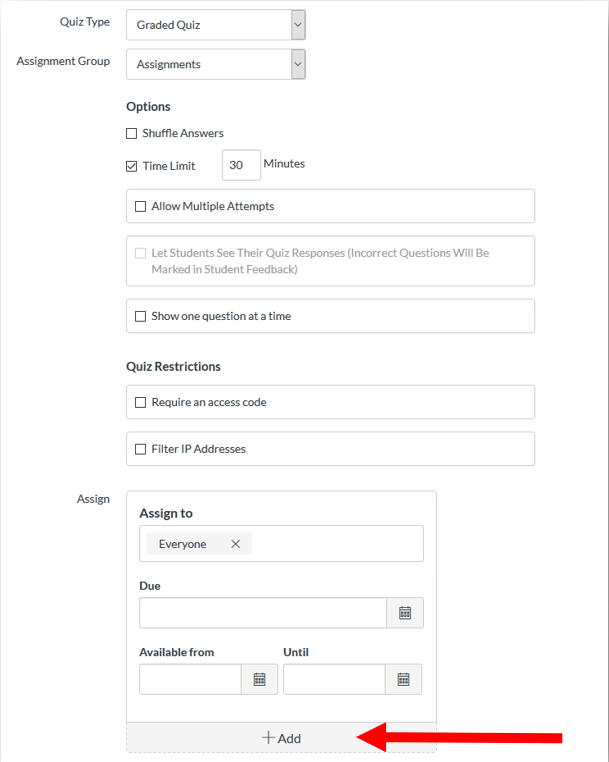
3. In the “Assign to” field, you can enter the names of the students who need extended time. Then set the “Due”, “Available from”, and “Until” fields to allow for the extended amount of time.
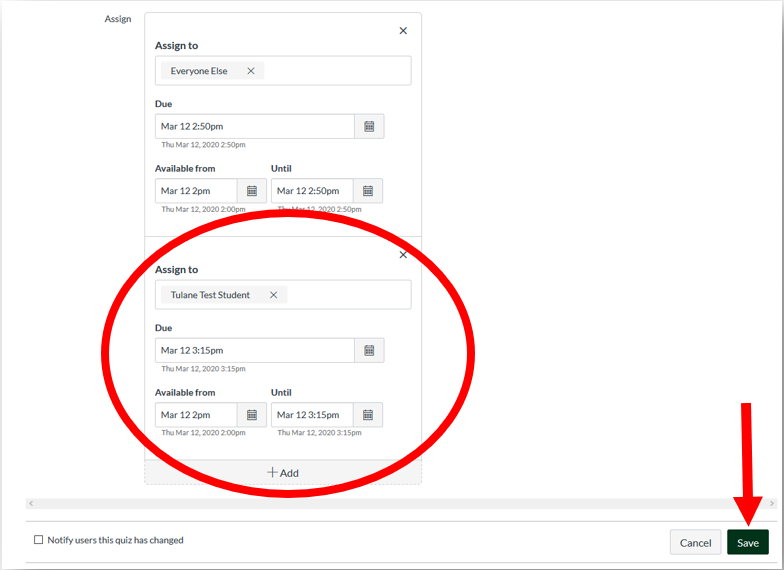
4. If any students have double time or need to begin their exam at an entirely different time or day, you can click of “+ Add” again to create different rules for each of these students.
5. After you have completed setting up the extended and/or alternate time, make sure to click the “Save” button at the bottom right before leaving the screen! If you do not, the changes you have made will be lost.
